Взлом: различия между версиями
D7iid (обсуждение | вклад) мНет описания правки |
Virusolog (обсуждение | вклад) |
||
| (не показано 9 промежуточных версий 3 участников) | |||
| Строка 34: | Строка 34: | ||
|+Провода | |+Провода | ||
!Имя | !Имя | ||
! | !Разрез | ||
! | !Восстановление | ||
!Сигнал мультитула | !Сигнал мультитула | ||
|- | |- | ||
| Строка 119: | Строка 119: | ||
==== | ==== Типы зон шлюзов ==== | ||
<div class="toccolours mw-collapsible mw-collapsed"> | <div class="toccolours mw-collapsible mw-collapsed"> | ||
Нажмите чтобы увидеть примеры подтипов: | |||
<div class="mw-collapsible-content"> | <div class="mw-collapsible-content"> | ||
MAINT | MAINT | ||
| Строка 174: | Строка 174: | ||
</div> | </div> | ||
==== | ==== Работа с шлюзами ==== | ||
* ''' | * '''Используйте [[Engineering_items#Multitool|multitool]] [[File:Multitool.png]] чтобы поднять болты'''. Сперва найдите два провода: bolts и main power. Как только нашли, идите к нужному вам шлюзу, multitool подайте ток на power wire, [[Engineering_items#Crowbar|сrowbar]] [[File:Crowbar.png]] откройте шлюз, подайте ток на bolts. Это опустит болты и заблокирует шлюз в открытом состоянии. Если шлюз заблокирован, подайте ток на bolts, затем на power и используйте [[Engineering_items#Crowbar|сrowbar]] [[File:Crowbar.png]]. | ||
* ''' | * '''Используйте [[Engineering_items#Multitool|multitool]] [[File:Multitool.png]] чтобы открыть шлюз на минуту.''' Это можно сделать сперва найдя провод main power и подав на него ток. Как только загорится (test light on), подавайте ток на провода, пока он вновь не потухнет. Вы нашли дополнительный источник питания. Используйте [[Engineering_items#Crowbar|crowbar]] [[File:Crowbar.png]], это откроет шлюз на минуту. | ||
* ''' | * '''Гетто взлом''' найдите шлюз и режьте все провода, пока не опустятся болты, сделайте заметку какой из проводов это сделал. Теперь можно резать все провода кроме болтов и открывть шлюз ломом. | ||
* '''Создание помехи''' опустите болты, перережьте все провода и заварите шлюз. | |||
* ''' | * '''Подать ток из далека''' можно прикрепить [[General_items#Remote_Signaling_Device|signaler]], который будет подавать ток на провод. Позволяет удалённо болтировать шлюзы. | ||
* ''' | |||
==== | ==== Защищенные шлюзы ==== | ||
Некоторые шлюзы защищены дополнительным слоем стали. | |||
Существуют 3 уровня защиты:<br> | |||
* ''' | * '''Обычная защита''' | ||
Стандартные шлюзы. | |||
* ''' | * '''Средняя защита''' | ||
Чтобы создать шлюз с средней защитой используйте '''metal''' на обычном шлюзе с открытой панелью.<br> | |||
Чтобы добраться до проводов нужно: | |||
# Откройте панель с помощью '''[[Engineering_items#Screwdriver|screwdriver]] [[File:Screwdriver_tool.png]]'''. | |||
# | # Разрежьте защиту с помощью '''[[Engineering_items#Welding_Tool|welding tool]]''' [[File:Welder.png]]. | ||
# | # Продолжайте как обычно. | ||
# | |||
* ''' | * '''Повышенная защита''' | ||
Чтобы создать используйте '''plasteel''' на обычном шлюзе с открытой панелью.<br> | |||
Чтобы добраться до проводов нужно: | |||
# Откройте панель с помощью '''[[Engineering_items#Screwdriver|screwdriver]] [[File:Screwdriver_tool.png]]'''. | |||
# | # Разрежьте наэлектризованную защиту с помощью '''[[Engineering_items#Wirecutters|wirecutters]] [[File:Wirecutters.png]]'''. Имейте при себе изоляционные перчатки. | ||
# | # Разрежьте внешний слой пласстали '''[[Engineering_items#Welding_Tool|welding tool]]''' [[File:Welder.png]]. | ||
# | # Удалите внешний слой пласстали '''[[Engineering_items#Crowbar|crowbar]]''' [[File:Crowbar.png]]. | ||
# | # Разрежьте внутренний слой пласстали '''[[Engineering_items#Welding_Tool|welding tool]]''' [[File:Welder.png]]. | ||
# | # Удалите внутренний слой пласстали '''[[Engineering_items#Crowbar|crowbar]]''' [[File:Crowbar.png]]. | ||
# | # Продолжайте как обычно. | ||
# | |||
==== | ====Аварийные шлюзы==== | ||
Некоторые шлюзы можно открыть руками, если они обесточены. | |||
=== [[File:ModernAPC.png|64px|link=APC]] [[APC]] === | === [[File:ModernAPC.png|64px|link=APC]] [[APC]] === | ||
Контролирует энергию в заданой области. Доступ ко всем APC можно получить через Power Monitoring Computers. | |||
# | # Отвёрткой нажмите на APC. | ||
# | # Нажмите пустой рукой для получения доступа к проводам. | ||
# | # Играйте с проводами как хотите, режьте, используйте мультитул. | ||
# | # Ещё раз используйте отвёртку чтобы закрыть панель. | ||
* Cover lock | * Cover lock не даёт открыть APC. Если выключен, можно открыть APC с помощью лома. | ||
* Interface lock | * Interface lock не даёт пользоваться APC. Можно разблокировать ID. | ||
{| class="wikitable" style="text-align:center" | {| class="wikitable" style="text-align:center" | ||
|+ | |+Провода | ||
! | !Имя | ||
! | !Разрез | ||
! | !Восстановление | ||
! | !Сигнал мультитула | ||
|- | |- | ||
! | !Питание (2 провода) | ||
| | |Отключает питание. Может ударить током!||Восстановление. Может ударить током!||Выключает питание на 2 минуты. Вы должны ''разрезать и соединить'' провода чтобы восстановить энергию. | ||
|- | |- | ||
!ID | !ID блокировка | ||
| | |Отключает блокирование по ID.||Восстанавливает.||Разблокирует панель APC на 30 секунд. | ||
|- | |- | ||
! | !Контроль ИИ | ||
| | |Отключает контроль ИИ.||Востанавливает.||''Очень быстро'' отключает контроль ИИ. | ||
|} | |} | ||
{| class="wikitable" style="text-align:center" | {| class="wikitable" style="text-align:center" | ||
|+ | |+Окно статуса | ||
! | !Имя | ||
! | !Статус | ||
! | !Показывает | ||
|- | |- | ||
!rowspan="2"| | !rowspan="2"|Блокировка | ||
|The interface light is red.||APC | |The interface light is red.||APC заблокирован. | ||
|- | |- | ||
|The interface light is green.||APC | |The interface light is green.||APC разблокирован. | ||
|- | |- | ||
!rowspan="2"| | !rowspan="2"|Питание | ||
|The short indicator is on.||APC | |The short indicator is on.||APC не работает. | ||
|- | |- | ||
|The short indicator is off.||APC | |The short indicator is off.||APC работает. | ||
|- | |- | ||
!rowspan="2"| | !rowspan="2"|Контроль ИИ | ||
|The AI connection light is off.|| | |The AI connection light is off.||ИИ/борги не могут взаимодействовать с APC. | ||
|- | |- | ||
|The AI connection light is on.|| | |The AI connection light is on.||ИИ/борги могут взаимодействовать с APC. | ||
|} | |} | ||
=== [[File:autolathe.png|64px|link=Autolathe]] [[Autolathe]] === | === [[File:autolathe.png|64px|link=Autolathe]] [[Autolathe]] === | ||
# | # Нажмите на Autolathe отвёрткой чтобы получить доступ к проводам. | ||
# | # Здесь два важных провода, которые рандомизированы. Надрез включает соответствующий индикатор, подача напряжения включает на 30 секунд. Красный огонёк питание, голубой индикатор взлома. Ни один из проводов не бьётся током. | ||
Веселитесь с доступом к [[Autolathe|новым возможностям]]. | |||
{| class="wikitable" style="text-align:center" | {| class="wikitable" style="text-align:center" | ||
|+ | |+Провода | ||
! | !Имя | ||
! | !Разрез | ||
! | !Восстановление | ||
! | !Сигнал мультитула | ||
|- | |- | ||
! | !Питание (показывет red light если выключен) | ||
| | |Питания нет.||Питание есть.||Короткое (~30 сек) выключение. | ||
|- | |- | ||
! | !Электрификация (показывает green light если выключен) | ||
| | |Электрифицирован.||Нет.||Короткая (~30 сек) электрификация. | ||
|- | |- | ||
! | !Взлом (показывет blue light если выключен) | ||
| | |Взломан.||Нет.||Короткий (~30 сек) взлом. | ||
|} | |} | ||
=== [[File:AirAlarm.png|64px|link=Air_Alarm]] [[Air Alarm]] === | === [[File:AirAlarm.png|64px|link=Air_Alarm]] [[Air Alarm]] === | ||
Станция заполнена плазмой, а все атмостехи и CE не компетентны и/или мертвы? Время взять всё в свои руки. | |||
# | #Отвёрткой оголите проводку. | ||
# | #Нажмите еа Air Alarm interface и Wiring interface. | ||
# | #Три огонька: | ||
#*'' | #*''Air Alarm'' '''разблокирован/заблокирован'''.'' | ||
#*'' | #*''Air Alarm'' '''работает!/нет'''.'' | ||
#*'' | #*'''Контроль ИИ разрешён' '''да/нет'''.'' | ||
# | #Пять проводов: | ||
#*''' | #*'''Доступ''': ''Мультитул'' переключает блок ID. ''Разрез'' блокирует перманентно пока не ''восстановлен''. | ||
#*''' | #*'''Сифон''': ''Мультитул'' переключает PANIC SIPHON вкл/вкл. | ||
#*''' | #*'''Питание''': ''Мультитул'' отключает Air Alarm на 30(?) секунд, можно ''разрезать'' и ''восстановлен'' провода если спешите. ''Разрез'' отключает Air Alarm. | ||
#*''' | #*'''Контроль ИИ''': ''Мультитул'' отключает контроль ИИ на 30(?) секунд. ''Разрез'' отключает контроль ИИ на 30(?) секунд после восстанавления. | ||
#*''' | #*'''Тревога''': ''Разрез'' начинает тревогу, ''мультитул'' отключает тревогу. | ||
#Screwdriver to close wiring. | #Screwdriver to close wiring. | ||
Отключение ''Air Alarms'' не показывется индикатором. | |||
{| class="wikitable" style="text-align:center" | {| class="wikitable" style="text-align:center" | ||
|+ | |+Провода | ||
! | !Имя | ||
! | !Разрез | ||
! | !Восстановление | ||
! | !Сигнал мультитула | ||
|- | |- | ||
! | !Питание | ||
| | |Отключает питание.||Восстанавливает.||Отключает питание. Можно восстановить. | ||
|- | |- | ||
! | !Доступ | ||
| | |Блокирует интерфейс пока не восстановлен.||Разблокирует.||Переключает блокировку ID вкл/выкл. | ||
|- | |- | ||
! | !Сифон | ||
| | |Начинает PANIC SIPHON||Ничего||Переключает PANIC SIPHON вкл/выкл. | ||
|- | |- | ||
! | !Контроль ИИ | ||
| | |Отключает контроль ИИ.||Восстанавливает через ~30 секунд.||Временно (~30 секун) отключает. | ||
|- | |- | ||
! | !Тревога | ||
| | |Включает.||Ничего||Перезагружает тревогу. | ||
|} | |} | ||
=== [[File:Security_Camera.gif|64px|link=Security Camera]] [[Security Camera]] | === [[File:Security_Camera.gif|64px|link=Security Camera]] [[Security Camera|Камеры наблюдения]] === | ||
{{anchor|Cameras}} | {{anchor|Cameras}} | ||
Сбойный ИИ не сможет высосать воздух, если отключить ему глаза. | |||
# | # Отвёрткой нажмите на камеру. | ||
# | # Теперь можно сделать несколько вещей: | ||
#* ''' | #* '''Кусачки''': ''разрез'' отключает камеру, ''восстановление'' включает камеру. | ||
#* ''' | #* '''Мультитул''': ''сигнал мультитула'' ограничивает радиус камеры с 7 тайлов до 2. ИИ не получит оповещение. | ||
=== [[File:Generic_borg.png|64px|link=Cyborg]][[File:Engborg.png|64px|link=Cyborg]] [[Cyborg|Киборги]] === | |||
Используйте следующий метод: | |||
#[[File:Id_regular.png]] ID картой, [[File:Emag.png]] [[Emag|емагом]] или попростие кибога разблокировать панель. | |||
#[[File:Crowbar.png]] Ломом откройте панель | |||
#[[File:Emag.png]] Опционально: [[Emag|емагните]] кибога чтобы пропустить "после этого" (не работает если ИИ [[Guide_to_malfunction|малф]]) | |||
#[[File:Hud-hands.gif]] Удалите батарейку пустой рукой | |||
#[[File:Screwdriver_tool.png]] Отвёрткой оголите провода | |||
#[[File:Wirecutters.png]] Кусачками или [[File:Multitool.png]] мультитулом взаимодействуйте с проводами | |||
После этого: | |||
#[[File: | #[[File:Screwdriver_tool.png]] Отвёрткой закройте провода | ||
#[[File: | #[[File:Power_cell.png]] Замените батарейку | ||
#[[File: | #[[File:Crowbar.png]] Ломом закройте панель | ||
#[[File: | #[[File:Id_regular.png]] Заблокируйте панель ID картой. | ||
Борги имеют семь проводов; пять рабочих и два нет: | |||
{| class="wikitable" style="text-align:center" | {| class="wikitable" style="text-align:center" | ||
! | !Имя | ||
! | !Назначение | ||
! | !Разрез | ||
! | !Восстановление | ||
! | !Сигнал мультитула | ||
|- | |- | ||
!Law sync module | !Law sync module | ||
| | |Законы борга обновляются, если обновляются законы ИИ.||Законы не обновляются.||Включает синхронизацию.||Синхронизирует законы с ИИ борга. ''Borg gently chimes.'' | ||
|- | |- | ||
!Intelligence link | !Intelligence link | ||
| | |Закрепляет борга за ИИ, делая борга рабом. Нужен для LawSync.||Освобождает борга, отключает LawSync.||Ничего.||Можно выбрать ИИ для порабощения борга. | ||
|- | |- | ||
!Camera light | !Camera light | ||
| | |Переключает камеры борга.||Переключает статус камер борга.||Тоже самое что и разрез.||Тоже самое что и разрез. ''Borg's camera lense focuses loudly..'' | ||
|- | |- | ||
!Lockdown indicator | !Lockdown indicator | ||
| | |Блокирует борга.||Включает блок.||Выключает блок.||Переключает статус блока. | ||
|- | |- | ||
!Reset module hardware <br>''( | !Reset module hardware <br>''(обозначен как "Reset Module")'' | ||
| | |Перезагружает модуль борга чтобы он мог выбрать другой.||Перезагружает модуль борга не давая ему выбрать новый.||Разрешает боргу выбрать новый модуль.||Ничего. ''Borg's module servos twitch.'' | ||
|- | |- | ||
! | !Два провода | ||
| | |Ничего||---||---||--- | ||
|} | |} | ||
Емагнутый борг не будет иметь LawSync или AI link и не может быть перезагружен: он должен быть разобран (или взорван) и построен заново. | |||
Помните, киборги очень дорогие! Не уничтожайте их, если в этом нет необходимости. | |||
=== [[File:MULE.gif|64px|link=quartermaster#Requisition_Me_a_Beat(ing)]] [[quartermaster#Requisition_Me_a_Beat(ing)|MULEbot]] === | === [[File:MULE.gif|64px|link=quartermaster#Requisition_Me_a_Beat(ing)]] [[quartermaster#Requisition_Me_a_Beat(ing)|MULEbot]] === | ||
{{anchor|MULE}} | {{anchor|MULE}} | ||
#Разблокируйте управление с помощью Quartermaster/Cargo Technician/Head Of Personnel/Captain ID. | |||
#Откройте панель отвёрткой. | |||
# | #Сделайте что хотите. | ||
# | #закройте крышку. | ||
# | |||
# | |||
{| class="wikitable" style="text-align:center" | {| class="wikitable" style="text-align:center" | ||
|+ | |+Провода | ||
! | !Имя | ||
! | !Разрез | ||
! | !Восстановление | ||
! | !Сигнал мультитула | ||
|- | |- | ||
! | !Питание (2 провода) | ||
| | |Отключает питание.||Восстанавливает.||''The charge light flickers.'' -сообщение. | ||
|- | |- | ||
! | !Двигатель (2 провода) | ||
| | |Один провод увеличивает скорость немного. <br>Второй сильно увеличивает скорость. <br>Оба перерезаны = отключает двигатель.||Восстанавливает.||''The drive motor whines briefly.'' -сообщение. | ||
|- | |- | ||
! | !Радио (4 провода) | ||
| | |Один или более перерезаны = отключает контроль PDA.||Восстанавливает.||''You hear a radio crackle.'' -сообщение. | ||
|- | |- | ||
! | !Безопасность | ||
| | |Отключает безопасность, пробуждает жажду крови. <br>(НЕ ДЕЛАЙТЕ ЭТОГО ЕСЛИ ВЫ НЕ ПРЕДАТЕЛЬ ИЛИ НЕ ХОТИТЕ УМЕРЕТЬ)||Восстанавливает.||''The external warning lights flash briefly.'' -сообщение. | ||
|- | |- | ||
! | !Загрузка | ||
| | |Позволяет перевозить не стандартные грузы (людей, киборгов, других ботов).||Отключает.||''The load platform clunks.'' -сообщение. | ||
|} | |} | ||
=== {{anchor|Supply Shuttle Console}}[[File:Supply_Shuttle_Console.png|64px]][[Computers#Supply_Shuttle_Console|Supply Shuttle Console]] === | === {{anchor|Supply Shuttle Console}}[[File:Supply_Shuttle_Console.png|64px]][[Computers#Supply_Shuttle_Console|Supply Shuttle Console]] === | ||
Кто хочет разблокировать [[Quartermaster#|контрабанду]]? | |||
Позволяет заказывать контрабанду (например предметы клоуна). [[Emag|Емагом]] можно разблокировать больше. | |||
#[[Guide_to_construction#Computers| | #[[Guide_to_construction#Computers|Разберите]] Supply Shuttle Console отвёрткой, ломом и кусачками | ||
# | #Хватайте плату | ||
# | #Используйте на ней мультитул | ||
# | #Соберите всё обратно. | ||
=== [[File:Requests_Console.gif|64px]][[Guide_to_construction#Requests_Console|Requests Console]] === | === [[File:Requests_Console.gif|64px]][[Guide_to_construction#Requests_Console|Requests Console]] === | ||
#Ломом откройте панель. | |||
#Используйте отвёртку. | |||
# | #Закройте ломом. | ||
# | |||
# | |||
=== [[Particle Accelerator]] === | === [[Particle Accelerator]] === | ||
| Строка 452: | Строка 437: | ||
Можно выпустить [[singularity|сингулярность]] УДАЛЁННО! Или повысить силу частиц. | |||
# | #Соберите PA, используйте отвёртку на консоли. | ||
# | #Нажмите на консоль рукой. Вот что можно сделать имея инструменты: | ||
#*''' | #*'''Питание''': ''сигнал мультитула'' выключает или включает PA, ''разрез'' выключает PA. | ||
#*''' | #*'''Сила''': ''сигнал мультитула'' увеличивает силу PA, ''разрез'' выставит силу на 0. | ||
#*''' | #*'''Интерфейс''': не даёт людям пользоваться интерфейсом. ''сигнал мультитула'' переключает это, ''разрез'' выключает интерфейс. | ||
#*''' | #*'''Лимит''': ''разрез'' позволяет выставить силу на 3. ''Сигнал мультитула'' создаст громкий звук. | ||
#*''' | #*'''Ничего''': Ничего не делает, существует для сложности. | ||
# | #Закройте панель. '''ВАЖНО!''' Не забудьте снова просканировать части. | ||
Можно прикрепить [[Signaler]], для удалённого выпуска сингулярности. | |||
{| class="wikitable" style="text-align:center" | {| class="wikitable" style="text-align:center" | ||
|+ | |+Провода | ||
! | !Имя | ||
! | !Разрез | ||
! | !Восстановление | ||
! | !Сигнал мультитула | ||
|- | |- | ||
! | !Питание | ||
| | |Выключает питание.||Восстанавливает.||Переключает вкл/выкл. | ||
|- | |- | ||
! | !Сила | ||
| | |Устанавливает силу на 0, не даёт её сменить.||Восстанавливает.||Увеличивает силу. | ||
|- | |- | ||
! | !Интерфейс | ||
| | |Блокирует контроль.||Восстанавливает.||Переключает вкл/выкл. | ||
|- | |- | ||
! | !Лимит | ||
| | |Позволяет выставить силу 3.||Восстанавливает.||Создаёт шум. | ||
|- | |- | ||
! | !Ничего | ||
| | |Ничего.||Ничего.||Ничего. | ||
|} | |} | ||
=== [[File:Emitter_On.gif|64px]] Particle Emitter === | === [[File:Emitter_On.gif|64px]] Particle Emitter === | ||
Только один провод. Сигнал мультитула заставит эмиттер выстрелить. | |||
=== [[File:Syndicate_Bomb.gif|64px|link=Syndicate Bomb]] [[Syndicate Bomb]] === | === [[File:Syndicate_Bomb.gif|64px|link=Syndicate Bomb]] [[Syndicate Bomb|Бомба синдиката]] === | ||
# Посмотрите на таймер и убедитесь, что хватает времени попытаться обезвредить её. | |||
# Если времени достаточно, можете одеть сапёрный костюм. Он не спасёт вас от смерти, но вас будет куда легче реанимировать. | |||
# Отвёрткой нажмите на бомбу и оголите провода. | |||
# Нажмите мультитулом или кусачками на бомбу. | |||
# ОСТОРОЖНО подавайте ток на провода и режьте нужный. | |||
#* '''Взрыв''': ''сигнал мультитула'' взорвёт бомбу, если она активна, ''разрез'' сделает тоже самое! Его не опредилить заранее. Перерезав провод до активации бомбы, вы выведите её из строя. | |||
#* '''Болты''': ''сигнал мультитула'' даст подсказку о назначении провода, ''разрез'' отсоединит бомбу от пола. Выкидывайте её в космос! | |||
#* '''Задержка''': ''сигнал мультитула'' добавит немного времени к таймеру. | |||
#* '''Продвижение''': ''сигнал мультитула'' уменьшит время на таймере, ''разрез'' вызовит взрыв! | |||
#* '''Активация''': ''сигнал мультитула'' бомба начнёт отсчёт, ''разрез'' бомба остановит отсчёт. Если вы нашли этот провод, вы победили! | |||
Имейте ввиду, что на бомбе работает внезапная смерть. Это означает, что при использовании кусачек есть 40% шанс взрыва на любой провод, в то время как мультитул всего 20%! Вам ПРИДЁТСЯ разрезать провод чтобы остановить взрыв, но можно увеличит шанс на успех используя мультитул. В бриге лежит тестовая бомба. Ваши шансы взорвать себя по ошибке 50% используя сначала мультитул и 66.66% если вы просто режите провода. | |||
{| class="wikitable" style="text-align:center" | {| class="wikitable" style="text-align:center" | ||
|+ | |+Провода АКТИВИРОВАННОЙ бомбы | ||
! | !Имя | ||
! | !Разрез | ||
! | !Восстановление | ||
! | !Сигнал мультитула | ||
|- | |- | ||
! | !Активация | ||
| | |Останавливает отсчёт.||Ничего.||Добавляет время к таймеру. "The bomb seems to hesitate for a moment." | ||
|- | |- | ||
! | !Задержка | ||
| | |Ничего.||Ничего.||Добавляет время к таймеру. "The bomb chirps." | ||
|- | |- | ||
! | !Болты | ||
| | |Поднимает болты.||Ничего.||"The bolts spin in place for a moment." | ||
|- | |- | ||
! | !Продвижение | ||
| | |Взрыв.||Ничего, u ded.||Уменьшает время на таймере! "The bomb buzzes ominously!" | ||
|- | |- | ||
! | !Взрыв | ||
| | |Взрыв.||Ничего, u ded.||Взрыв. | ||
|} | |} | ||
{| class="wikitable" style="text-align:center" | {| class="wikitable" style="text-align:center" | ||
|+ | |+Провода НЕ АКТИВИРОВАННОЙ бомбы | ||
! | !Имя | ||
! | !Разрез | ||
! | !Восстановление | ||
! | !Сигнал мультитула | ||
|- | |- | ||
! | !Активация | ||
| | |Ничего.||Ничего.||Начинает отсчёт. | ||
|- | |- | ||
! | !Задержка | ||
| | |Ничего.||Ничего.||"The bomb chirps." | ||
|- | |- | ||
! | !Болты | ||
| | |Поднимает болты.||Ничего.||"The bolts spin in place for a moment." | ||
|- | |- | ||
! | !Продвижение | ||
| | |Ничего.||Ничего.||"The bomb buzzes ominously!" | ||
|- | |- | ||
! | !Взрыв | ||
| | |Делает бомбу не рабочей.||Восстанавливает.||Ничего. | ||
|} | |} | ||
==== | ====Как удалить оболочку у бомбы ==== | ||
#Бомба должна быть не активна. Если идёт отсчёт, будет взрыв. | |||
# | #Откройте бомбу [[Engineering_items#Screwdriver|отвёрткой]] [[File:Screwdriver_tool.png]]. | ||
# | #Нажмите на бомбу [[Engineering_items#Wirecutters|кусачками]] [[File:Wirecutters.png]] и режьте все провода. | ||
# | #Используйте [[Engineering_items#Crowbar|лом]] [[File:Crowbar.png]]. | ||
# | |||
=== [[File:C4.gif|64px|link=Syndicate_Items#Plastic_Explosive_charge_(C4)]] [[Syndicate_Items#Plastic_Explosive_charge_(C4)|Plastic Explosives (C4)]]=== | === [[File:C4.gif|64px|link=Syndicate_Items#Plastic_Explosive_charge_(C4)]] [[Syndicate_Items#Plastic_Explosive_charge_(C4)|Plastic Explosives (C4)]]=== | ||
#Имеет только один провод: | |||
#*'''Взрыв''': когда ''перерезан'', вызывает взрыв. Когда ''подан ток'', тоже взрывается! | |||
# | Можно присоединить [[Signaler]]. | ||
#*''' | |||
{| class="wikitable" style="text-align:center" | {| class="wikitable" style="text-align:center" | ||
|+ | |+Провода | ||
! | !Имя | ||
! | !Разрез | ||
! | !Восстановление | ||
! | !Сигнал мультитула | ||
|- | |- | ||
! | !Взрыв (2 провода) | ||
| | |Взрыв.||Ничего.||Взрыв. | ||
|} | |} | ||
=== [[File:Vendboozeomat.gif|64px|link=Vending machines]] [[File:Vendsec.gif|64px|link=Vending machines]] [[File:Vendmed.gif|64px|link=Vending machines]] [[File:Vendcoffee.gif|64px|link=Vending machines]] [[Vending machines|Vending Machines]] === | === [[File:Vendboozeomat.gif|64px|link=Vending machines]] [[File:Vendsec.gif|64px|link=Vending machines]] [[File:Vendmed.gif|64px|link=Vending machines]] [[File:Vendcoffee.gif|64px|link=Vending machines]] [[Vending machines|Vending Machines]] === | ||
Единственная вещь, которую действительно стоит взламывать! | |||
# | #Нажмите отвёрткой. | ||
# | #Можно переключать спикер вкл/выкл. | ||
#Четыре огонька: | |||
# | #*''The orange light is off.''электризация. | ||
#*''The orange light is off.'' | #*''The red light is '''blinking/off'''.'' Blinking означает, что работает нормально, off означает, что автомат будет стрелять вещами. | ||
#*''The red light is '''blinking/off'''.'' Blinking | #*''The green light is '''off/on'''.'' доступна контрабанда если on. | ||
#*''The green light is '''off/on'''.'' | #*''A '''purple/yellow''' light is on.'' Purple означает, что есть ограничение на допуск. Yellow - кто-угодно может использовать автомат. | ||
#*''A '''purple/yellow''' light is on.'' Purple | #Четыре провода: | ||
# | #*'''Стрельба''': если ''подать ток'' начнёт стрелять предметами. ''Разрез'' делает тоже самое. | ||
#*''' | #*'''Контрабанда''': ''разрез'' ничего не делает. Если ''подать ток''включает контрабанду. | ||
#*''' | #*'''Доступ''': если ''подать ток'' позволяет заблокировать доступ. | ||
#*''' | #*'''Электризация''': бьёт током. | ||
#*''' | |||
{| class="wikitable" style="text-align:center" | {| class="wikitable" style="text-align:center" | ||
|+ | |+Провода | ||
! | !Имя | ||
! | !Разрез | ||
! | !Восстановление | ||
! | !Сигнал мультитула | ||
|- | |- | ||
! | !Стрельба | ||
| | |Машина стреляет предметами.||Восстанавливает.||Переключает. | ||
|- | |- | ||
! | !Контрабанда | ||
|Nothing.|| | |Nothing.||Ничего.||Переключает. | ||
|- | |- | ||
! | !Доступ | ||
| | |Ограничивает доступ.||Ничего.||Переключает. | ||
|- | |- | ||
! | !Ток | ||
| | |Удар током. | ||
|} | |} | ||
=== [[File:secure.png|64px]] [[File:safe.png|64px]] Secure Briefcase, Wall Safe === | === [[File:secure.png|64px]] [[File:safe.png|64px]] Secure Briefcase, Wall Safe === | ||
# | #Нажмите отвёрткой | ||
# | #Мультитулом пока не получите сообщение memory is reset. | ||
# | #Отвёртка. | ||
# | #Введите новый пароль из пяти цифр нажмите Е. | ||
# | #Введите пароль и нажмите Е. | ||
<br> | <br> | ||
=== [[File:Vaultsafe.png|64px]] | === [[File:Vaultsafe.png|64px]] Сейф === | ||
Открывается при помощи [[stethoscope]]: | |||
# | # Крутите пока не увидите "tink", "krink", или "plink". | ||
# | # Крутите в другую сторону пока не увидите "tonk", "krunk", или "plunk" и "Spring", "Sprang", "Sproing", "Clunk", или "Krunk". | ||
# | # Откройте. | ||
=== [[File:Station_Bounced_Radio.png|64px|link=Station_Bounced_Radio]] [[File:Wallradio.png|64px|link=Intercom]] [[Station_Bounced_Radio|Radio]]/[[Intercom]] === | === [[File:Station_Bounced_Radio.png|64px|link=Station_Bounced_Radio]] [[File:Wallradio.png|64px|link=Intercom]] [[Station_Bounced_Radio|Radio]]/[[Intercom]] === | ||
# | # Отвёрткой нажмите на радио. | ||
# Три провода: | |||
# | #* '''Выход''': ''сигнал мультитула'' переключает спикер вкл/выкл. ''Разрез'' выключает спикер. | ||
#* ''' | #* '''Вход''': ''сигнал мультитула'' переключает микрофон вкл/выкл. ''Разрез'' выключает микрофон. | ||
#* ''' | #* '''Dummy''': ''сигнал мультитула'' выключает микрофон и спикер если они включены, включает если выключены. ''Разрез'' ничего не делает. | ||
#* '''Dummy | # Отвёрткой закройте панель. | ||
# | |||
{| class="wikitable" style="text-align:center" | {| class="wikitable" style="text-align:center" | ||
|+ | |+Провода | ||
! | !Имя | ||
! | !Разрез | ||
! | !Восстановление | ||
! | !Сигнал мултитула | ||
|- | |- | ||
! | !Выход | ||
| | |Выключает спикер.||Восстановление.||Переключает вкл/выкл. | ||
|- | |- | ||
! | !Вход | ||
| | |Выключает микрофон.||Восстановление.||Переключает вкл/выкл. | ||
|- | |- | ||
!Dummy | !Dummy | ||
| | |Ничего.||Ничего.||Переключает оба вкл/выкл. | ||
|} | |} | ||
=== [[File:Security_Gas_Mask.png|64px|link=Security_gas_mask#Security_Gas_Mask]] [[Security_gas_mask#Security_Gas_Mask|Security Gas Mask]] === | === [[File:Security_Gas_Mask.png|64px|link=Security_gas_mask#Security_Gas_Mask]] [[Security_gas_mask#Security_Gas_Mask|Security Gas Mask]] === | ||
Можно менять агресивность выкриков на маске. Используйте отвёртку для смены уровня, либо кусачки (необратимая смена на высший уровень агресивности) | |||
Можно воспользоваться [[File:Emag.png]] [[Emag|емагом]]. | |||
=== [[File:Suit_Storage_Unit.png|64px|link=Suit Storage Unit]] [[Suit Storage Unit]] === | === [[File:Suit_Storage_Unit.png|64px|link=Suit Storage Unit]] [[Suit Storage Unit]] === | ||
Нажмите отвёрткой на закрытый ящик. | |||
{| class="wikitable" style="text-align:center" | {| class="wikitable" style="text-align:center" | ||
|+ | |+Провода | ||
! | !Имя | ||
! | !Разрез | ||
! | !Восстановление | ||
! | !Сигнал мультитула | ||
|- | |- | ||
! | !Взлом | ||
| | |Увеличивает силу decontamination (The UV bulb is glowing).||Возвращает как было (The UV bulb is dim).||Переключает (unless wire is cut). | ||
|- | |- | ||
! | !Безопасность | ||
| | |Позволяет заталкивать внутрь живых людей (Service light on = безопасность выключена).||Востанавливает (Service light off = безопасность включена).||Переключает. | ||
|- | |- | ||
! | !Напряжние | ||
| | |Искры.||Искры.||Искры. | ||
|- | |- | ||
! | !Ничего (2 провода) | ||
| | |Ничего.||Ничего.||Ничего. | ||
|} | |} | ||
{| class="wikitable" style="text-align:center" | {| class="wikitable" style="text-align:center" | ||
|+ | |+Окно статуса | ||
! | !Имя | ||
! | !Статус | ||
! | !Показывает | ||
|- | |- | ||
!rowspan="2"| | !rowspan="2"|Сеть | ||
|The UV bulb is dim.|| | |The UV bulb is dim.||Мало энергии. | ||
|- | |- | ||
|The UV bulb is glowing.|| | |The UV bulb is glowing.||Много энергии. | ||
|- | |- | ||
!rowspan="2"|Safety | !rowspan="2"|Safety | ||
|The service light is off.|| | |The service light is off.||безопасность включена. | ||
|- | |- | ||
|The service light is on.|| | |The service light is on.||безопасность выключена. | ||
|- | |- | ||
|} | |} | ||
=== [[File:Tesla_coil.gif|64px]] Tesla Coil === | === [[File:Tesla_coil.gif|64px]] Tesla Coil === | ||
Только один провод: подайте ток чтобы вызвать разряд теслы. | |||
=== [[File:Roulette_wheel_spinning.gif|64px|link=Machines#Roulette_Table]] [[Machines#Roulette_Table|Roulette Table]] === | === [[File:Roulette_wheel_spinning.gif|64px|link=Machines#Roulette_Table]] [[Machines#Roulette_Table|Roulette Table]] === | ||
Не увеличит ваши шансы на выигрыш. | |||
Удалите верх с помощью [[Engineering_items#Welding_Tool|welding tool]] [[File:Welder.png]] чтобы получить доступ к проводам. Присоедините обратно с помощью [[Engineering_items#Welding_Tool|welding tool]] [[File:Welder.png]]. | |||
{| class="wikitable" style="text-align:center" | {| class="wikitable" style="text-align:center" | ||
|+ | |+Провода | ||
! | !Имя | ||
! | !Разрез | ||
! | !Восстановление | ||
! | !Сигнал | ||
|- | |- | ||
! | !Ток | ||
| | |Удар током.||Восстанавливает питание.||Удар током. | ||
|- | |- | ||
! | !Болты | ||
| | |Опускает болты.||Ничего.||Переключает болты. | ||
|- | |- | ||
! | !Обнулить владельца | ||
| | |Удар током.||Ничего.||Удаляет владельца и снимает замок. | ||
|- | |- | ||
!Vend Prize | !Vend Prize | ||
| | |Удар током, выдаёт 10% валюты с аккаунта владельца и включает тревогу.||Ничего.||Удар током, выдаёт 20% валюты с аккаунта владельца и включает тревогу. | ||
|} | |} | ||
{| class="wikitable" style="text-align:center" | {| class="wikitable" style="text-align:center" | ||
|+ | |+Окно статуса | ||
! | !Имя | ||
! | !Статус | ||
! | !Показывает | ||
|- | |- | ||
!rowspan="2"| | !rowspan="2"|Болты | ||
|The machines bolts look up.|| | |The machines bolts look up.||Не прикреплён к полу. | ||
|- | |- | ||
|The machines bolts have fallen!|| | |The machines bolts have fallen!||Прикреплён к полу. | ||
|- | |- | ||
!rowspan="2"| | !rowspan="2"|Питание | ||
|The main circuit is "on" | |The main circuit is "on".||Питание есть. | ||
|- | |- | ||
|The main circuit is "off" | |The main circuit is "off".||Питания нет. | ||
|- | |- | ||
!rowspan="2"| | !rowspan="2"|Замок | ||
|The main system lock appears to be "off".|| | |The main system lock appears to be "off".||Защита от воров выключенна. | ||
|- | |- | ||
|The main system lock appears to be "on".|| | |The main system lock appears to be "on".||Защита от воров включенна. | ||
|- | |- | ||
!rowspan="2"|Linked Owner | !rowspan="2"|Linked Owner | ||
|The account balance system appears to be "disconnected".|| | |The account balance system appears to be "disconnected".||У автомата нет владельца. | ||
|- | |- | ||
|The account balance system appears to be connected to "''Name''".|| | |The account balance system appears to be connected to "''Name''".||Автомат присоединён к "''имя''" ID. | ||
|- | |- | ||
|} | |} | ||
==Tips== | ==Tips== | ||
* | * Из обогревателя можно вынуть батарейку в 1000 ватт. | ||
* | * Взлом шлюзов: перерезание основного провода питания выключает питание на 10 секунд. Сигнал мультитула делает тоже самое. Лучше всего подать сигнал на запасной источник питания, а затем на основной, что лишит шлюза питания на 1 минуту. | ||
* | * Чтобы быстро восстановить питание, перережте и восстановите основной провод питания. | ||
* | * Используйте отвёртку на мышеловке, добавьте igniter взаместо timer при создании гранаты, у вас получилась мина. Добавьте с 100-100 potassium-water и любой, кто наступит на неё, пожалеет об этом. | ||
* | * С помощью EMP можно открывать шкафчики. | ||
* | * Добавьте плазму в батарею и вставьте её в дубинку. Следующая атака произведёт взрыв, который серьёзно травмирует атакующего и его цель. | ||
* | * Можно емагнуть light replacer. При установке лампочки он добавит в неё плазму, что привёдёт ко взрыву, если её включить. | ||
* | * Вся станция питается от одного провода. Если нет желания использовать power sink, режьте провод. Работает только если не настроены соляры. | ||
* | * Можно емагнуть кнопку, чтобы получить доступ к ней. | ||
* Wall-mounted flashers | * Wall-mounted flashers и portable flashers можно лишить энергии кусачками. | ||
* | * Можно установить 90 градусов на обогревателе, что будет наносить урон людям. | ||
* | * С помощью отвёртки можно зарядить .357 в револьвер детектива, но он может взорваться в руках. Не забудьте разрядить его перед этим. | ||
* | * Как предатель инженер, вы можете сделать следующие: | ||
*# | *# Возьмите два signaler. | ||
*# | *# В комнате телекоммов присоедините сигналер к проводу питания АПЦ. | ||
*# | *# Теперь вы можете отключить телекоммы на несколько минут. | ||
* Можно отвязать pAI от владельца с помощью емага. | |||
*# Можно присоединить Voice Analyzer к Remote Signalling Device и установить частоту и фразу для активации. | |||
* | *# Создать бомбу, но взаместо igniter+timer, использовать igniter+signaller. Можно настроить активацию по голосу | ||
*# Теперь бомба взорвётся как только вы скажете кодовую фразу! | |||
* Можно создать бомбу для мести. Если кто-то отправит вас в крит, вы можете на последнем дыхании сказать кодовую фразу (используя '#'), чтобы активировать бомбу. | |||
*# | |||
*# | |||
*# | |||
* | |||
[[Category:Guides]] | [[Category:Guides]] | ||
Текущая версия от 18:38, 3 декабря 2023
Ваши инструменты
![]() Insulated Gloves для предотвращения удара током. При взломе можно задеть провод питания, что приведёт к подачи тока прямо сквозь ваше тело. Можно, конечно, взламывать и без них, но это будет медленно и больно. Можно выпить
Insulated Gloves для предотвращения удара током. При взломе можно задеть провод питания, что приведёт к подачи тока прямо сквозь ваше тело. Можно, конечно, взламывать и без них, но это будет медленно и больно. Можно выпить  Grey Bull, что сделает вас неуязвимым к электричеству на короткое время.
![]() Screwdriver для доступа к проводам. Необходимый инструмент.
Screwdriver для доступа к проводам. Необходимый инструмент.
![]() Wirecutters для того чтобы резать и соединять провода.
Wirecutters для того чтобы резать и соединять провода.
 Multitool для подачи напряжения на провод. Делает взлом на много легче.
![]() Signaler может подавать напряжение на провода удалённо. Присоедините к проводу, вторым подайте сигнал на первый.
Signaler может подавать напряжение на провода удалённо. Присоедините к проводу, вторым подайте сигнал на первый.
![]() Station blueprints для определение какой провод за что отвечает. Если сможете достать, отпадёт необходимость определять провода методом тыка.
Station blueprints для определение какой провод за что отвечает. Если сможете достать, отпадёт необходимость определять провода методом тыка.
Что можно взломать


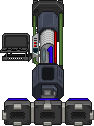
 Airlock
Все шлюзы можно взломать. Назначение проводов определяется в начале каждого раунда ДЛЯ КАЖДОГО ДЕПАРТАМЕНТА ОТДЕЛЬНО. Т.е. если оранжевый провод в инженерном опускает болты, тот же провод делает тоже самое на всех инженерных шлюзах. Примеры зон можно найти здесь. Открыв окно взлома можно прочитать тип шлюза.
Запомните, отключение подачи электричества на шлюз, выключит все остальные системы.
- Screwdriver
 в руках, нажмите на шлюз, чтобы открыть крышку и оголить провода.
 - С multitool , wirecutters
 , или пустой рукой, нажмите чтобы получить доступ к проводам.
 - multitool возьмите в руку и нажмите "pulse" для подачи тока на провод или держите wirecutters и нажмите "cut" чтобы перерезать провод.
- Screwdriver закрыть панель.

- Существуют два основных и два дополнительных провода питания.
- Отключение любого основного провода заставит сработать (дополнительное) питание через 10 секунд. Отключение обоих пар проводов полностью обесточит шлюз.
- Если шлюз обесточен, его можно открыть
 Turn off Combat Modeили
 Enable with 4, disable with 1 or toggle with F by default. Left-clicking people with an empty hand will Harm
  them if on, or Help
  them if off. Prevents you from switching places or being pushed when colliding with people. and then left-click.
 Ordinary right-click. It doesn't matter if Combat Mode Enable with 4, disable with 1 or toggle with F by default. Left-clicking people with an empty hand will Harm them if on, or Help them if off. Prevents you from switching places or being pushed when colliding with people. is on or not. с crowbar
  , если не опущены болты.
- Если шлюз обесточен, его можно открыть
- Отключив соединение с ИИ, ИИ и кибоги не смогут взаимодействовать с шлюзом, но ИИ сможет взломать дверь. Это занимает минуту. Когда шлюз взломан, они смогут его использовать даже если соединение с ИИ отключено.
| Имя | Разрез | Восстановление | Сигнал мультитула |
|---|---|---|---|
| Main Power (2 провода) | Отключает основной источник питания. | Восстанавливает питание. Может ударить током, но не электризует шлюз. | Отключает питание на 1 минуту. |
| Auxiliary Power (2 провода) | Отключает дополнительный источник питания. Может ударить током, но не электризует шлюз. | Восстанавливает питание. Может ударить током, но не электризует шлюз. | Отключает питание на 1 минуту. |
| ID Scan | Шлюз отвергает любые карты доступа. Подав сигнал на "open" заставит шлюз открыться. | Восстанавливает нормальную проверку ID. | Мигает будто бы кто-то без доступа пытается открыть шлюз. |
| Bolts | Опускает болты на шлюзе. | Ничего. | Опускает болты на шлюзе. Поднимает, если опущены. |
| Bolt Lights | Отключает красный индикатор болтов. | Включает индикатор. | Переключает индикатор. |
| Open | Ничего. | Ничего. | Открывает шлюз если на нём общий доступ или если ID scan перерезан. |
| AI Connection | Отключает управление ИИ. | Восстанавливает управление ИИ. | Очень быстро отключает управление ИИ. |
| High Voltage Ground (электризует провода) | Электризует шлюз. | Деэлектризует шлюз. | Электризует шлюз на 30 секунд. |
| High Voltage Circuit (2 провода) | Может ударить током, но не электризует шлюз. | Может ударить током, но не электризует шлюз. | Ничего. |
| Safety | Отключает предохранитель, позволяя шлюзу закрываться на человеке. | Включает предохранитель. | Переключает предохранитель. |
| Timing | Отключает таймер, что не даёт шлюзу закрываться автоматически. | Восстанавливает таймер. | Переключает скорость заставляя шлюз закрываться быстрее. |
| Ничего (2 провода) | Ничего. | Ничего. | Ничего. |
| Имя | Статус | Значение |
|---|---|---|
| Bolts | The door bolts look up. | Болты на шлюзе подняты (шлюз не заблокирован). |
| The door bolts have fallen! | Болты на шлюзе опущены (шлюз заблокирован). | |
| Power | The test light is on. | Есть питание. |
| The test light is off. | Нет питания (можно открыть Turn off Combat Mode или | |
| AI Connection | The AI connection light is on. | ИИ может контролировать шлюз и не взломал его. |
| The AI connection light is off. | ИИ не может контролировать шлюз или взломал его. | |
| Safety | The 'Check Wiring' light is on. | Предохранитель отключен (может придавить человека). |
| The 'Check Wiring' light is off. | Предохранитель включен (не может придавить человека). | |
| Timer | The timer is powered on. | Шлюз закрывается автоматически. |
| The timer is powered off. | Шлюз не закрывается автоматически. | |
| Timing | The speed light is on. | Таймер на шлюзе обычный (закрывается с задержкой). |
| The speed light is off. | Таймер на шлюзе меньше обычного (закрывается без задержки). | |
| Emergency light (не имеет провода) |
The emergency light is on. | Экстренный доступ включен (нет ограничения по доступу). |
| The emergency light is off. | Экстренный доступ выключен (есть ограничение по доступу). |
Типы зон шлюзов
Нажмите чтобы увидеть примеры подтипов:
MAINT
- maintenance/...
COMMAND
- bridge/...
- crew_quarters/heads/...
- teleporter/...
- gateway/...
- security/nuke_storage/...
- ai_monitored/nuke_storage/...
SERVICE
- crew_quarters/kitchen/...
- crew_quarters/bar/...
- quartermaster/...
- janitor/...
- hydroponics/...
SECURITY
- security/...
- ai_monitored/security/armory/...
ENGINEERING
- engine/...
- solar/...
- tcommsat/...
MEDBAY
- medical/...
SCIENCE
- science/...
AI
- ai_monitored/storage/satellite/...
- ai_monitored/turret_protected/...
- aisat/...
PUBLIC
- hallway/...
- crew_quarters/...
- library/...
- chapel/...
- lawoffice/...
- construction/...
- storage/...
- ai_monitored/storage/eva/...
Работа с шлюзами
- Используйте multitool чтобы поднять болты. Сперва найдите два провода: bolts и main power. Как только нашли, идите к нужному вам шлюзу, multitool подайте ток на power wire, сrowbar откройте шлюз, подайте ток на bolts. Это опустит болты и заблокирует шлюз в открытом состоянии. Если шлюз заблокирован, подайте ток на bolts, затем на power и используйте сrowbar .
- Используйте multitool чтобы открыть шлюз на минуту. Это можно сделать сперва найдя провод main power и подав на него ток. Как только загорится (test light on), подавайте ток на провода, пока он вновь не потухнет. Вы нашли дополнительный источник питания. Используйте crowbar , это откроет шлюз на минуту.
- Гетто взлом найдите шлюз и режьте все провода, пока не опустятся болты, сделайте заметку какой из проводов это сделал. Теперь можно резать все провода кроме болтов и открывть шлюз ломом.
- Создание помехи опустите болты, перережьте все провода и заварите шлюз.
- Подать ток из далека можно прикрепить signaler, который будет подавать ток на провод. Позволяет удалённо болтировать шлюзы.
Защищенные шлюзы
Некоторые шлюзы защищены дополнительным слоем стали.
Существуют 3 уровня защиты:
- Обычная защита
Стандартные шлюзы.
- Средняя защита
Чтобы создать шлюз с средней защитой используйте metal на обычном шлюзе с открытой панелью.
Чтобы добраться до проводов нужно:
- Откройте панель с помощью screwdriver .
- Разрежьте защиту с помощью welding tool
 .
. - Продолжайте как обычно.
- Повышенная защита
Чтобы создать используйте plasteel на обычном шлюзе с открытой панелью.
Чтобы добраться до проводов нужно:
- Откройте панель с помощью screwdriver .
- Разрежьте наэлектризованную защиту с помощью wirecutters . Имейте при себе изоляционные перчатки.
- Разрежьте внешний слой пласстали welding tool .
- Удалите внешний слой пласстали crowbar .
- Разрежьте внутренний слой пласстали welding tool .
- Удалите внутренний слой пласстали crowbar .
- Продолжайте как обычно.
Аварийные шлюзы
Некоторые шлюзы можно открыть руками, если они обесточены.
 APC
APC
Контролирует энергию в заданой области. Доступ ко всем APC можно получить через Power Monitoring Computers.
- Отвёрткой нажмите на APC.
- Нажмите пустой рукой для получения доступа к проводам.
- Играйте с проводами как хотите, режьте, используйте мультитул.
- Ещё раз используйте отвёртку чтобы закрыть панель.
- Cover lock не даёт открыть APC. Если выключен, можно открыть APC с помощью лома.
- Interface lock не даёт пользоваться APC. Можно разблокировать ID.
| Имя | Разрез | Восстановление | Сигнал мультитула |
|---|---|---|---|
| Питание (2 провода) | Отключает питание. Может ударить током! | Восстановление. Может ударить током! | Выключает питание на 2 минуты. Вы должны разрезать и соединить провода чтобы восстановить энергию. |
| ID блокировка | Отключает блокирование по ID. | Восстанавливает. | Разблокирует панель APC на 30 секунд. |
| Контроль ИИ | Отключает контроль ИИ. | Востанавливает. | Очень быстро отключает контроль ИИ. |
| Имя | Статус | Показывает |
|---|---|---|
| Блокировка | The interface light is red. | APC заблокирован. |
| The interface light is green. | APC разблокирован. | |
| Питание | The short indicator is on. | APC не работает. |
| The short indicator is off. | APC работает. | |
| Контроль ИИ | The AI connection light is off. | ИИ/борги не могут взаимодействовать с APC. |
| The AI connection light is on. | ИИ/борги могут взаимодействовать с APC. |
 Autolathe
- Нажмите на Autolathe отвёрткой чтобы получить доступ к проводам.
- Здесь два важных провода, которые рандомизированы. Надрез включает соответствующий индикатор, подача напряжения включает на 30 секунд. Красный огонёк питание, голубой индикатор взлома. Ни один из проводов не бьётся током.
Веселитесь с доступом к новым возможностям.
| Имя | Разрез | Восстановление | Сигнал мультитула |
|---|---|---|---|
| Питание (показывет red light если выключен) | Питания нет. | Питание есть. | Короткое (~30 сек) выключение. |
| Электрификация (показывает green light если выключен) | Электрифицирован. | Нет. | Короткая (~30 сек) электрификация. |
| Взлом (показывет blue light если выключен) | Взломан. | Нет. | Короткий (~30 сек) взлом. |
 Air Alarm
Станция заполнена плазмой, а все атмостехи и CE не компетентны и/или мертвы? Время взять всё в свои руки.
- Отвёрткой оголите проводку.
- Нажмите еа Air Alarm interface и Wiring interface.
- Три огонька:
- Air Alarm разблокирован/заблокирован.
- Air Alarm работает!/нет.
- 'Контроль ИИ разрешён' да/нет.
- Пять проводов:
- Доступ: Мультитул переключает блок ID. Разрез блокирует перманентно пока не восстановлен.
- Сифон: Мультитул переключает PANIC SIPHON вкл/вкл.
- Питание: Мультитул отключает Air Alarm на 30(?) секунд, можно разрезать и восстановлен провода если спешите. Разрез отключает Air Alarm.
- Контроль ИИ: Мультитул отключает контроль ИИ на 30(?) секунд. Разрез отключает контроль ИИ на 30(?) секунд после восстанавления.
- Тревога: Разрез начинает тревогу, мультитул отключает тревогу.
- Screwdriver to close wiring.
Отключение Air Alarms не показывется индикатором.
| Имя | Разрез | Восстановление | Сигнал мультитула |
|---|---|---|---|
| Питание | Отключает питание. | Восстанавливает. | Отключает питание. Можно восстановить. |
| Доступ | Блокирует интерфейс пока не восстановлен. | Разблокирует. | Переключает блокировку ID вкл/выкл. |
| Сифон | Начинает PANIC SIPHON | Ничего | Переключает PANIC SIPHON вкл/выкл. |
| Контроль ИИ | Отключает контроль ИИ. | Восстанавливает через ~30 секунд. | Временно (~30 секун) отключает. |
| Тревога | Включает. | Ничего | Перезагружает тревогу. |
 Камеры наблюдения
Сбойный ИИ не сможет высосать воздух, если отключить ему глаза.
- Отвёрткой нажмите на камеру.
- Теперь можно сделать несколько вещей:
- Кусачки: разрез отключает камеру, восстановление включает камеру.
- Мультитул: сигнал мультитула ограничивает радиус камеры с 7 тайлов до 2. ИИ не получит оповещение.

 Киборги
Используйте следующий метод:
 ID картой,
  емагом или попростие кибога разблокировать панель.
- Ломом откройте панель
- Опционально: емагните кибога чтобы пропустить "после этого" (не работает если ИИ малф)
 Удалите батарейку пустой рукой
- Отвёрткой оголите провода
- Кусачками или мультитулом взаимодействуйте с проводами
После этого:
- Отвёрткой закройте провода
 Замените батарейку
- Ломом закройте панель
- Заблокируйте панель ID картой.
Борги имеют семь проводов; пять рабочих и два нет:
| Имя | Назначение | Разрез | Восстановление | Сигнал мультитула |
|---|---|---|---|---|
| Law sync module | Законы борга обновляются, если обновляются законы ИИ. | Законы не обновляются. | Включает синхронизацию. | Синхронизирует законы с ИИ борга. Borg gently chimes. |
| Intelligence link | Закрепляет борга за ИИ, делая борга рабом. Нужен для LawSync. | Освобождает борга, отключает LawSync. | Ничего. | Можно выбрать ИИ для порабощения борга. |
| Camera light | Переключает камеры борга. | Переключает статус камер борга. | Тоже самое что и разрез. | Тоже самое что и разрез. Borg's camera lense focuses loudly.. |
| Lockdown indicator | Блокирует борга. | Включает блок. | Выключает блок. | Переключает статус блока. |
| Reset module hardware (обозначен как "Reset Module") |
Перезагружает модуль борга чтобы он мог выбрать другой. | Перезагружает модуль борга не давая ему выбрать новый. | Разрешает боргу выбрать новый модуль. | Ничего. Borg's module servos twitch. |
| Два провода | Ничего | --- | --- | --- |
Емагнутый борг не будет иметь LawSync или AI link и не может быть перезагружен: он должен быть разобран (или взорван) и построен заново.
Помните, киборги очень дорогие! Не уничтожайте их, если в этом нет необходимости.
 MULEbot
- Разблокируйте управление с помощью Quartermaster/Cargo Technician/Head Of Personnel/Captain ID.
- Откройте панель отвёрткой.
- Сделайте что хотите.
- закройте крышку.
| Имя | Разрез | Восстановление | Сигнал мультитула |
|---|---|---|---|
| Питание (2 провода) | Отключает питание. | Восстанавливает. | The charge light flickers. -сообщение. |
| Двигатель (2 провода) | Один провод увеличивает скорость немного. Второй сильно увеличивает скорость. Оба перерезаны = отключает двигатель. |
Восстанавливает. | The drive motor whines briefly. -сообщение. |
| Радио (4 провода) | Один или более перерезаны = отключает контроль PDA. | Восстанавливает. | You hear a radio crackle. -сообщение. |
| Безопасность | Отключает безопасность, пробуждает жажду крови. (НЕ ДЕЛАЙТЕ ЭТОГО ЕСЛИ ВЫ НЕ ПРЕДАТЕЛЬ ИЛИ НЕ ХОТИТЕ УМЕРЕТЬ) |
Восстанавливает. | The external warning lights flash briefly. -сообщение. |
| Загрузка | Позволяет перевозить не стандартные грузы (людей, киборгов, других ботов). | Отключает. | The load platform clunks. -сообщение. |
 Supply Shuttle Console

Кто хочет разблокировать контрабанду?
Позволяет заказывать контрабанду (например предметы клоуна). Емагом можно разблокировать больше.
- Разберите Supply Shuttle Console отвёрткой, ломом и кусачками
- Хватайте плату
- Используйте на ней мультитул
- Соберите всё обратно.
 Requests Console

- Ломом откройте панель.
- Используйте отвёртку.
- Закройте ломом.
Particle Accelerator
Можно выпустить сингулярность УДАЛЁННО! Или повысить силу частиц.
- Соберите PA, используйте отвёртку на консоли.
- Нажмите на консоль рукой. Вот что можно сделать имея инструменты:
- Питание: сигнал мультитула выключает или включает PA, разрез выключает PA.
- Сила: сигнал мультитула увеличивает силу PA, разрез выставит силу на 0.
- Интерфейс: не даёт людям пользоваться интерфейсом. сигнал мультитула переключает это, разрез выключает интерфейс.
- Лимит: разрез позволяет выставить силу на 3. Сигнал мультитула создаст громкий звук.
- Ничего: Ничего не делает, существует для сложности.
- Закройте панель. ВАЖНО! Не забудьте снова просканировать части.
Можно прикрепить Signaler, для удалённого выпуска сингулярности.
| Имя | Разрез | Восстановление | Сигнал мультитула |
|---|---|---|---|
| Питание | Выключает питание. | Восстанавливает. | Переключает вкл/выкл. |
| Сила | Устанавливает силу на 0, не даёт её сменить. | Восстанавливает. | Увеличивает силу. |
| Интерфейс | Блокирует контроль. | Восстанавливает. | Переключает вкл/выкл. |
| Лимит | Позволяет выставить силу 3. | Восстанавливает. | Создаёт шум. |
| Ничего | Ничего. | Ничего. | Ничего. |
 Particle Emitter

Только один провод. Сигнал мультитула заставит эмиттер выстрелить.
 Бомба синдиката
- Посмотрите на таймер и убедитесь, что хватает времени попытаться обезвредить её.
- Если времени достаточно, можете одеть сапёрный костюм. Он не спасёт вас от смерти, но вас будет куда легче реанимировать.
- Отвёрткой нажмите на бомбу и оголите провода.
- Нажмите мультитулом или кусачками на бомбу.
- ОСТОРОЖНО подавайте ток на провода и режьте нужный.
- Взрыв: сигнал мультитула взорвёт бомбу, если она активна, разрез сделает тоже самое! Его не опредилить заранее. Перерезав провод до активации бомбы, вы выведите её из строя.
- Болты: сигнал мультитула даст подсказку о назначении провода, разрез отсоединит бомбу от пола. Выкидывайте её в космос!
- Задержка: сигнал мультитула добавит немного времени к таймеру.
- Продвижение: сигнал мультитула уменьшит время на таймере, разрез вызовит взрыв!
- Активация: сигнал мультитула бомба начнёт отсчёт, разрез бомба остановит отсчёт. Если вы нашли этот провод, вы победили!
Имейте ввиду, что на бомбе работает внезапная смерть. Это означает, что при использовании кусачек есть 40% шанс взрыва на любой провод, в то время как мультитул всего 20%! Вам ПРИДЁТСЯ разрезать провод чтобы остановить взрыв, но можно увеличит шанс на успех используя мультитул. В бриге лежит тестовая бомба. Ваши шансы взорвать себя по ошибке 50% используя сначала мультитул и 66.66% если вы просто режите провода.
| Имя | Разрез | Восстановление | Сигнал мультитула |
|---|---|---|---|
| Активация | Останавливает отсчёт. | Ничего. | Добавляет время к таймеру. "The bomb seems to hesitate for a moment." |
| Задержка | Ничего. | Ничего. | Добавляет время к таймеру. "The bomb chirps." |
| Болты | Поднимает болты. | Ничего. | "The bolts spin in place for a moment." |
| Продвижение | Взрыв. | Ничего, u ded. | Уменьшает время на таймере! "The bomb buzzes ominously!" |
| Взрыв | Взрыв. | Ничего, u ded. | Взрыв. |
| Имя | Разрез | Восстановление | Сигнал мультитула |
|---|---|---|---|
| Активация | Ничего. | Ничего. | Начинает отсчёт. |
| Задержка | Ничего. | Ничего. | "The bomb chirps." |
| Болты | Поднимает болты. | Ничего. | "The bolts spin in place for a moment." |
| Продвижение | Ничего. | Ничего. | "The bomb buzzes ominously!" |
| Взрыв | Делает бомбу не рабочей. | Восстанавливает. | Ничего. |
Как удалить оболочку у бомбы
- Бомба должна быть не активна. Если идёт отсчёт, будет взрыв.
- Откройте бомбу отвёрткой .
- Нажмите на бомбу кусачками и режьте все провода.
- Используйте лом .
 Plastic Explosives (C4)
- Имеет только один провод:
- Взрыв: когда перерезан, вызывает взрыв. Когда подан ток, тоже взрывается!
Можно присоединить Signaler.
| Имя | Разрез | Восстановление | Сигнал мультитула |
|---|---|---|---|
| Взрыв (2 провода) | Взрыв. | Ничего. | Взрыв. |


 Vending Machines
Единственная вещь, которую действительно стоит взламывать!
- Нажмите отвёрткой.
- Можно переключать спикер вкл/выкл.
- Четыре огонька:
- The orange light is off.электризация.
- The red light is blinking/off. Blinking означает, что работает нормально, off означает, что автомат будет стрелять вещами.
- The green light is off/on. доступна контрабанда если on.
- A purple/yellow light is on. Purple означает, что есть ограничение на допуск. Yellow - кто-угодно может использовать автомат.
- Четыре провода:
- Стрельба: если подать ток начнёт стрелять предметами. Разрез делает тоже самое.
- Контрабанда: разрез ничего не делает. Если подать токвключает контрабанду.
- Доступ: если подать ток позволяет заблокировать доступ.
- Электризация: бьёт током.
| Имя | Разрез | Восстановление | Сигнал мультитула |
|---|---|---|---|
| Стрельба | Машина стреляет предметами. | Восстанавливает. | Переключает. |
| Контрабанда | Nothing. | Ничего. | Переключает. |
| Доступ | Ограничивает доступ. | Ничего. | Переключает. |
| Ток | Удар током. |

 Secure Briefcase, Wall Safe


- Нажмите отвёрткой
- Мультитулом пока не получите сообщение memory is reset.
- Отвёртка.
- Введите новый пароль из пяти цифр нажмите Е.
- Введите пароль и нажмите Е.
 Сейф
Сейф

Открывается при помощи stethoscope:
- Крутите пока не увидите "tink", "krink", или "plink".
- Крутите в другую сторону пока не увидите "tonk", "krunk", или "plunk" и "Spring", "Sprang", "Sproing", "Clunk", или "Krunk".
- Откройте.

 Radio/Intercom
- Отвёрткой нажмите на радио.
- Три провода:
- Выход: сигнал мультитула переключает спикер вкл/выкл. Разрез выключает спикер.
- Вход: сигнал мультитула переключает микрофон вкл/выкл. Разрез выключает микрофон.
- Dummy: сигнал мультитула выключает микрофон и спикер если они включены, включает если выключены. Разрез ничего не делает.
- Отвёрткой закройте панель.
| Имя | Разрез | Восстановление | Сигнал мултитула |
|---|---|---|---|
| Выход | Выключает спикер. | Восстановление. | Переключает вкл/выкл. |
| Вход | Выключает микрофон. | Восстановление. | Переключает вкл/выкл. |
| Dummy | Ничего. | Ничего. | Переключает оба вкл/выкл. |
 Security Gas Mask
Можно менять агресивность выкриков на маске. Используйте отвёртку для смены уровня, либо кусачки (необратимая смена на высший уровень агресивности)
Можно воспользоваться ![]() емагом.
емагом.
 Suit Storage Unit
Нажмите отвёрткой на закрытый ящик.
| Имя | Разрез | Восстановление | Сигнал мультитула |
|---|---|---|---|
| Взлом | Увеличивает силу decontamination (The UV bulb is glowing). | Возвращает как было (The UV bulb is dim). | Переключает (unless wire is cut). |
| Безопасность | Позволяет заталкивать внутрь живых людей (Service light on = безопасность выключена). | Востанавливает (Service light off = безопасность включена). | Переключает. |
| Напряжние | Искры. | Искры. | Искры. |
| Ничего (2 провода) | Ничего. | Ничего. | Ничего. |
| Имя | Статус | Показывает |
|---|---|---|
| Сеть | The UV bulb is dim. | Мало энергии. |
| The UV bulb is glowing. | Много энергии. | |
| Safety | The service light is off. | безопасность включена. |
| The service light is on. | безопасность выключена. |
 Tesla Coil

Только один провод: подайте ток чтобы вызвать разряд теслы.
 Roulette Table
Не увеличит ваши шансы на выигрыш.
Удалите верх с помощью welding tool ![]() чтобы получить доступ к проводам. Присоедините обратно с помощью welding tool
чтобы получить доступ к проводам. Присоедините обратно с помощью welding tool ![]() .
.
| Имя | Разрез | Восстановление | Сигнал |
|---|---|---|---|
| Ток | Удар током. | Восстанавливает питание. | Удар током. |
| Болты | Опускает болты. | Ничего. | Переключает болты. |
| Обнулить владельца | Удар током. | Ничего. | Удаляет владельца и снимает замок. |
| Vend Prize | Удар током, выдаёт 10% валюты с аккаунта владельца и включает тревогу. | Ничего. | Удар током, выдаёт 20% валюты с аккаунта владельца и включает тревогу. |
| Имя | Статус | Показывает |
|---|---|---|
| Болты | The machines bolts look up. | Не прикреплён к полу. |
| The machines bolts have fallen! | Прикреплён к полу. | |
| Питание | The main circuit is "on". | Питание есть. |
| The main circuit is "off". | Питания нет. | |
| Замок | The main system lock appears to be "off". | Защита от воров выключенна. |
| The main system lock appears to be "on". | Защита от воров включенна. | |
| Linked Owner | The account balance system appears to be "disconnected". | У автомата нет владельца. |
| The account balance system appears to be connected to "Name". | Автомат присоединён к "имя" ID. |
Tips
- Из обогревателя можно вынуть батарейку в 1000 ватт.
- Взлом шлюзов: перерезание основного провода питания выключает питание на 10 секунд. Сигнал мультитула делает тоже самое. Лучше всего подать сигнал на запасной источник питания, а затем на основной, что лишит шлюза питания на 1 минуту.
- Чтобы быстро восстановить питание, перережте и восстановите основной провод питания.
- Используйте отвёртку на мышеловке, добавьте igniter взаместо timer при создании гранаты, у вас получилась мина. Добавьте с 100-100 potassium-water и любой, кто наступит на неё, пожалеет об этом.
- С помощью EMP можно открывать шкафчики.
- Добавьте плазму в батарею и вставьте её в дубинку. Следующая атака произведёт взрыв, который серьёзно травмирует атакующего и его цель.
- Можно емагнуть light replacer. При установке лампочки он добавит в неё плазму, что привёдёт ко взрыву, если её включить.
- Вся станция питается от одного провода. Если нет желания использовать power sink, режьте провод. Работает только если не настроены соляры.
- Можно емагнуть кнопку, чтобы получить доступ к ней.
- Wall-mounted flashers и portable flashers можно лишить энергии кусачками.
- Можно установить 90 градусов на обогревателе, что будет наносить урон людям.
- С помощью отвёртки можно зарядить .357 в револьвер детектива, но он может взорваться в руках. Не забудьте разрядить его перед этим.
- Как предатель инженер, вы можете сделать следующие:
- Возьмите два signaler.
- В комнате телекоммов присоедините сигналер к проводу питания АПЦ.
- Теперь вы можете отключить телекоммы на несколько минут.
- Можно отвязать pAI от владельца с помощью емага.
- Можно присоединить Voice Analyzer к Remote Signalling Device и установить частоту и фразу для активации.
- Создать бомбу, но взаместо igniter+timer, использовать igniter+signaller. Можно настроить активацию по голосу
- Теперь бомба взорвётся как только вы скажете кодовую фразу!
- Можно создать бомбу для мести. Если кто-то отправит вас в крит, вы можете на последнем дыхании сказать кодовую фразу (используя '#'), чтобы активировать бомбу.